How to assemble the Damesa endless band and buckle system
The Damesa Endless Band and Buckle system was designed to provide a quick assembly solution as well as an efficient and hard-wearing clamping solution.
The Damesa Endless Band and Buckle system was designed to provide a quick assembly solution as well as an efficient and hard-wearing clamping solution. The system is composed of 30m or 50m rolls of stainless-steel banding in different bandwidths and thicknesses, which are cut to size and fastened using a buckle. Here are the assembly instructions in 6 easy steps:
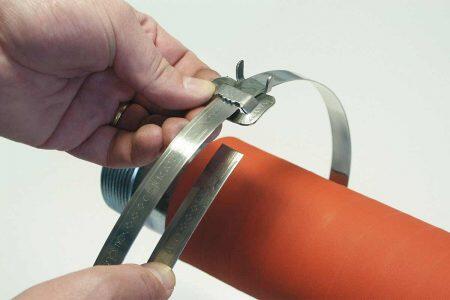
First, slide buckle on band as shown as shown in the first image. bringing end of band around object to be clamped and again through buckle leaving 2-3cm under the buckle.
For heavy-duty applications we recommend two turns of the banding around the hose as shown in Step 2
Subsequently, place the band end in the slot of the tool nose and gripper block of the DAMESA MRA-260 tightening tool. Move into slot as far as possible, to avoid the buckle sliding into the tool nose. Tighten the band clamp by turning the tension handle clockwise as shown in Step 3 while holding band gripper tight against band.
When you feel the band stop moving through buckle as you are turning the handle, maximum pressure is being exerted. At this point, stop tightening. Roll the tool over the buckle, backing off with the tension handle throughout entire rolling operation. Failure to back off with the tension handle while rolling over may result in the breaking of the band.
After rolling over the buckle, pull the cutting lever to cut off the excess band. The remaining band stub should be held down between the two buckle ears. Then hammer down the buckle ears to hold the band stub in place and complete the assembly of the Damesa Endless Band.